前言
Postfix: 发邮件,SMTP + SSL, Port 465
Dovecot: 做收发邮件的认证,收邮件,IMAP和POP3 + SSL, Port 993和995
Roundcubemail: 网页端
前期准备
- apache
- mysql
- php php-curl php-gd php-imagick php-mbstring php-mysql php-xml php-xmlrpc php-zip php-json php-intl libapache2-mod-php
- postfix dovecot dovecot-imapd dovecot-pop3d dovecot-mysql
- composer
- ssl证书,可以参考letsencrypt免费证书
- 配置domain的mx值
Step 1. 配置Postfix
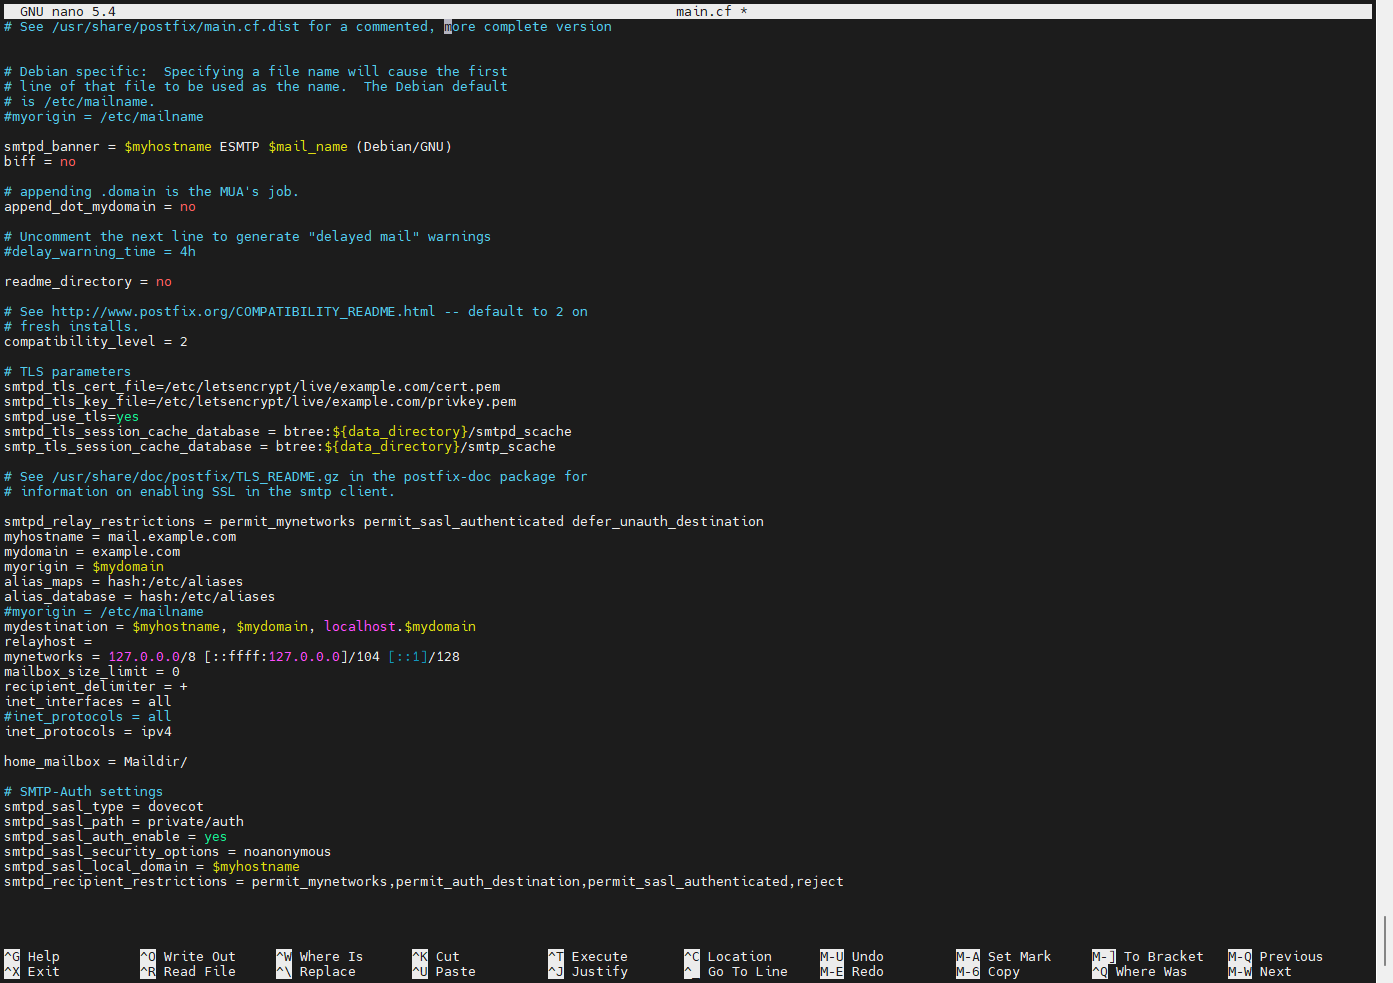
配置 #1 /etc/postfix/main.cf
主要是配置letsencrypt证书路径和配置使用dovecot来做认证
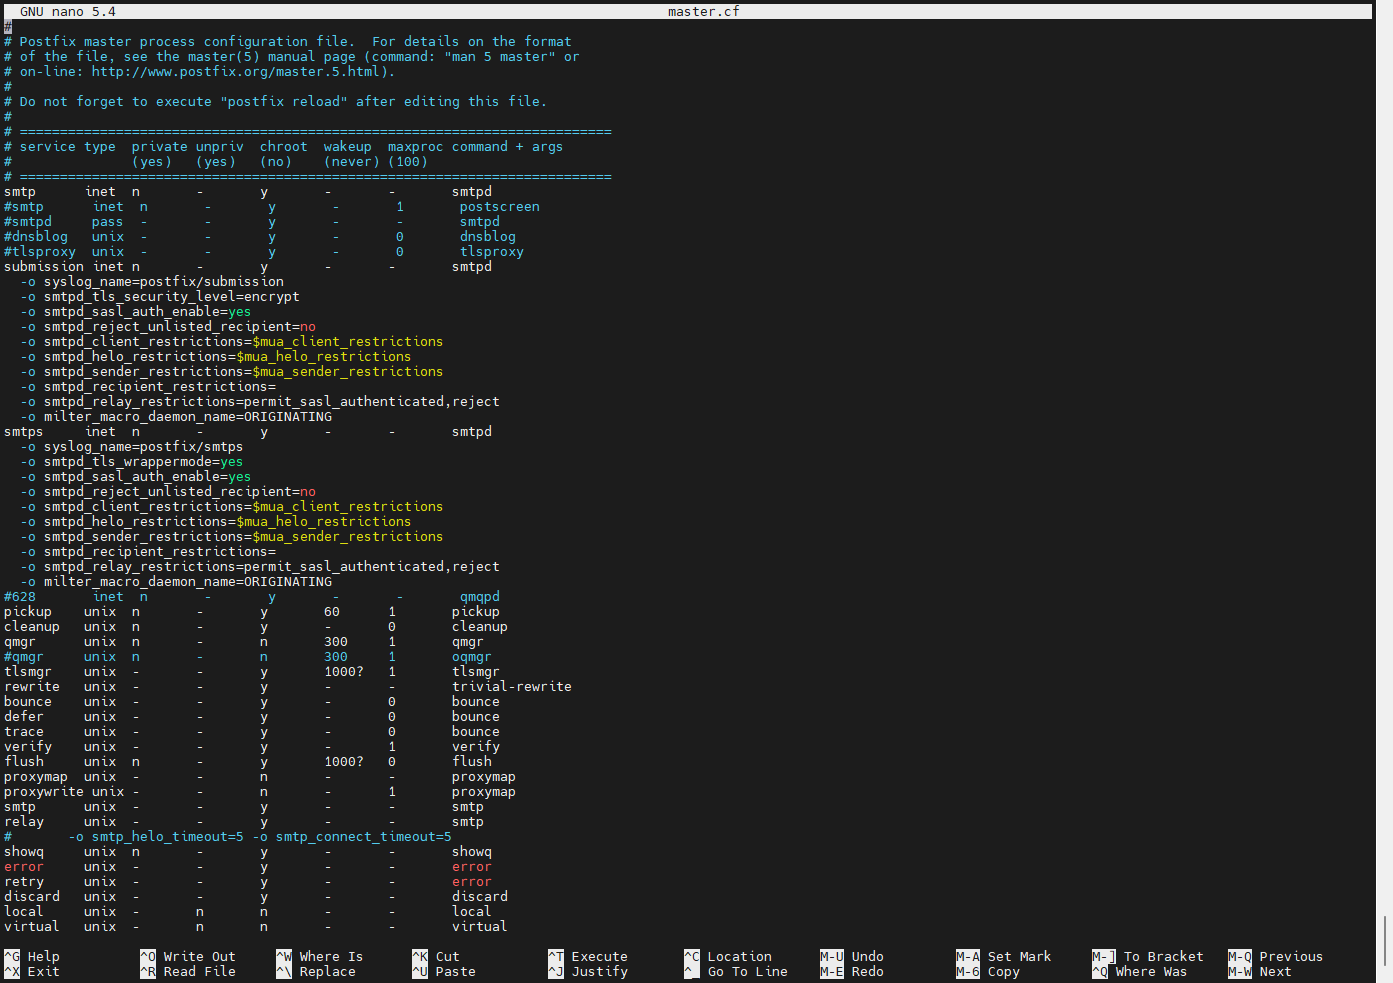
配置 #2 /etc/postfix/master.cf
主要是开启SSL
Step 2. 配置Dovecot
先生成一下dh.pem文件
dd if=/var/lib/dovecot/ssl-parameters.dat bs=1 skip=88 | openssl dhparam -inform der 2048 > /etc/dovecot/dh.pem配置 #1 /etc/dovecot/dovecot.conf
listen = *, ::
login_trusted_networks = 127.0.0.1/8 [::ffff:127.0.0.0]/104 [::1]/128
配置 #2 /etc/dovecot/conf.d/10-auth.conf
disable_plaintext_auth = yes
auth_mechanisms = plain login
!include auth-system.conf.ext
配置 #3 /etc/dovecot/conf.d/10-master.conf
设置imap和pop3的port = 0来关闭非加密链接
service imap-login {
  inet_listener imap {
    #port = 143
    port = 0
  }
  inet_listener imaps {
    #port = 993
    #ssl = yes
  }

service pop3-login {
  inet_listener pop3 {
    #port = 110
    port = 0
  }
  inet_listener pop3s {
    #port = 995
    #ssl = yes
  }
}
启用smtp-auth
 # Postfix smtp-auth
  unix_listener /var/spool/postfix/private/auth {
    mode = 0666
    user = postfix
    group = postfix
  }
配置 #4 /etc/dovecot/conf.d/10-ssl.conf
ssl = required
ssl_cert = </etc/letsencrypt/live/example.com/cert.pem
ssl_key = </etc/letsencrypt/live/example.com/privkey.pem
ssl_dh = </etc/dovecot/dh.pem
配置 #5 /usr/share/dovecot/protocols.d/
这里面新建两个文件
imapd.protocol
protocols = $protocols imappop3d.protocol
protocols = $protocols pop3启用一下服务
systemctl restart postfix
systemctl enable postfix
systemctl restart dovecot
systemctl enable dovecot
现在可以测一下了,分别测一下
- SMTPS端口:465
- IMAPS端口:993
- POP3S端口:995
openssl s_client --quiet -connect example.com:465


Step 3. 新建用户
我这里配的就是通过Linux的用户来登录,邮件内容附件之类的,都存在各自用户的home文件夹
adduser --disabled-login test
passwd test
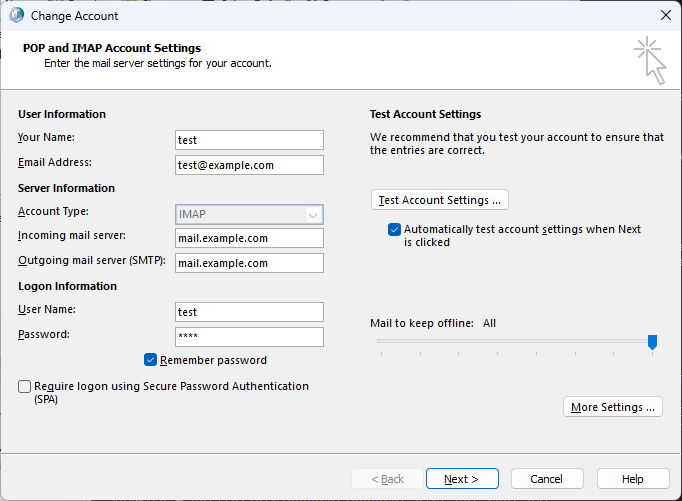
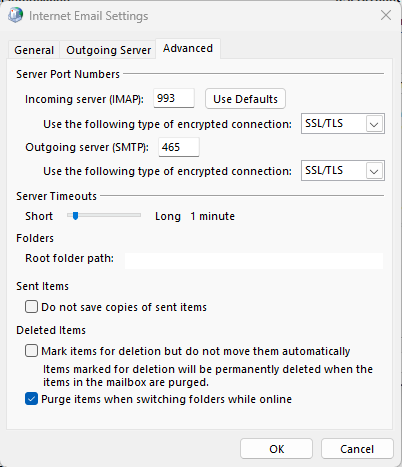
Step 4. 客户端链接
如图配置即可
Step 5. 配置Roundcubemail
配置 #1 php.ini
首先确定一下openssl的文件目录,把这个目录+certs填到openssl.capath
# openssl version -d
OPENSSLDIR: "/usr/lib/ssl"
extension=mbstring
extension=xmlrpc
extension=dom.so
date.timezone = "America/Los_Angeles"
upload_max_filesize = 12M
post_max_size = 18M
mbstring.func_overload = 0
openssl.capath=/usr/lib/ssl/certs配置 #2 ca-bundle.crt
下载最新的cacert文件,否则php去链接ssl的网站,会报证书错误
wget -c https://curl.se/ca/cacert.pem -O /usr/lib/ssl/certs/ca-bundle.crt配置 #3 composer.json
这个用它自带的composer.json-dist就好,重命名成composer.json
# cd /var/www/html/roundcube_location && composer update配置 #4 db
就按官方,建个用户,建个db
CREATE DATABASE roundcubemail CHARACTER SET utf8 COLLATE utf8_general_ci;
GRANT ALL PRIVILEGES ON roundcubemail.* TO username@localhost IDENTIFIED BY 'password';
FLUSH PRIVILEGES;
然后导入初始db
mysql roundcubemail < SQL/mysql.initial.sql配置 #5 文件权限
# sudo chown -R www-data:www-data /var/www/html/roundcube_location/
# sudo chmod 775 /var/www/roundcube/temp/ /var/www/roundcube/logs/
配置 #6 config/config.inc.php
这个可以先去页面 https://example.com/installer一步一步生成
然后去小幅修改一下,具体的参数解释在config/defaults.inc.php
host前面记得加SSL,ssl://example.com:993
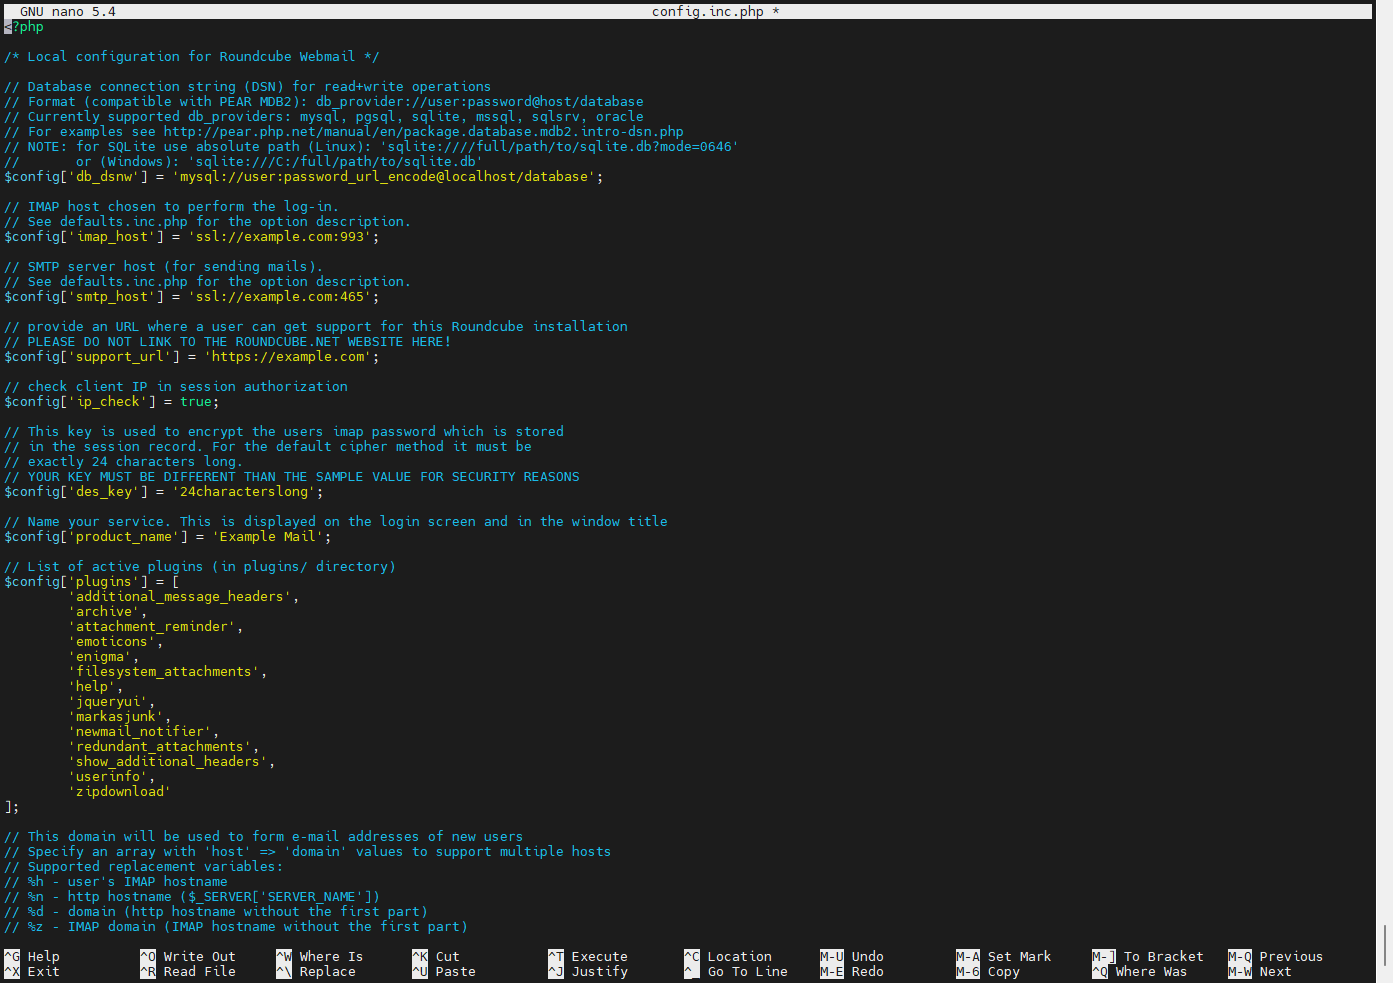
如果是letsencrypt的证书,还需要给ssl的验证关了
$config['imap_conn_options'] = array('ssl' => array('verify_peer' => false));
$config['smtp_conn_options'] = array('ssl' => array('verify_peer' => false));
配置 #7 删除installer文件夹
然后,就可以正常使用了
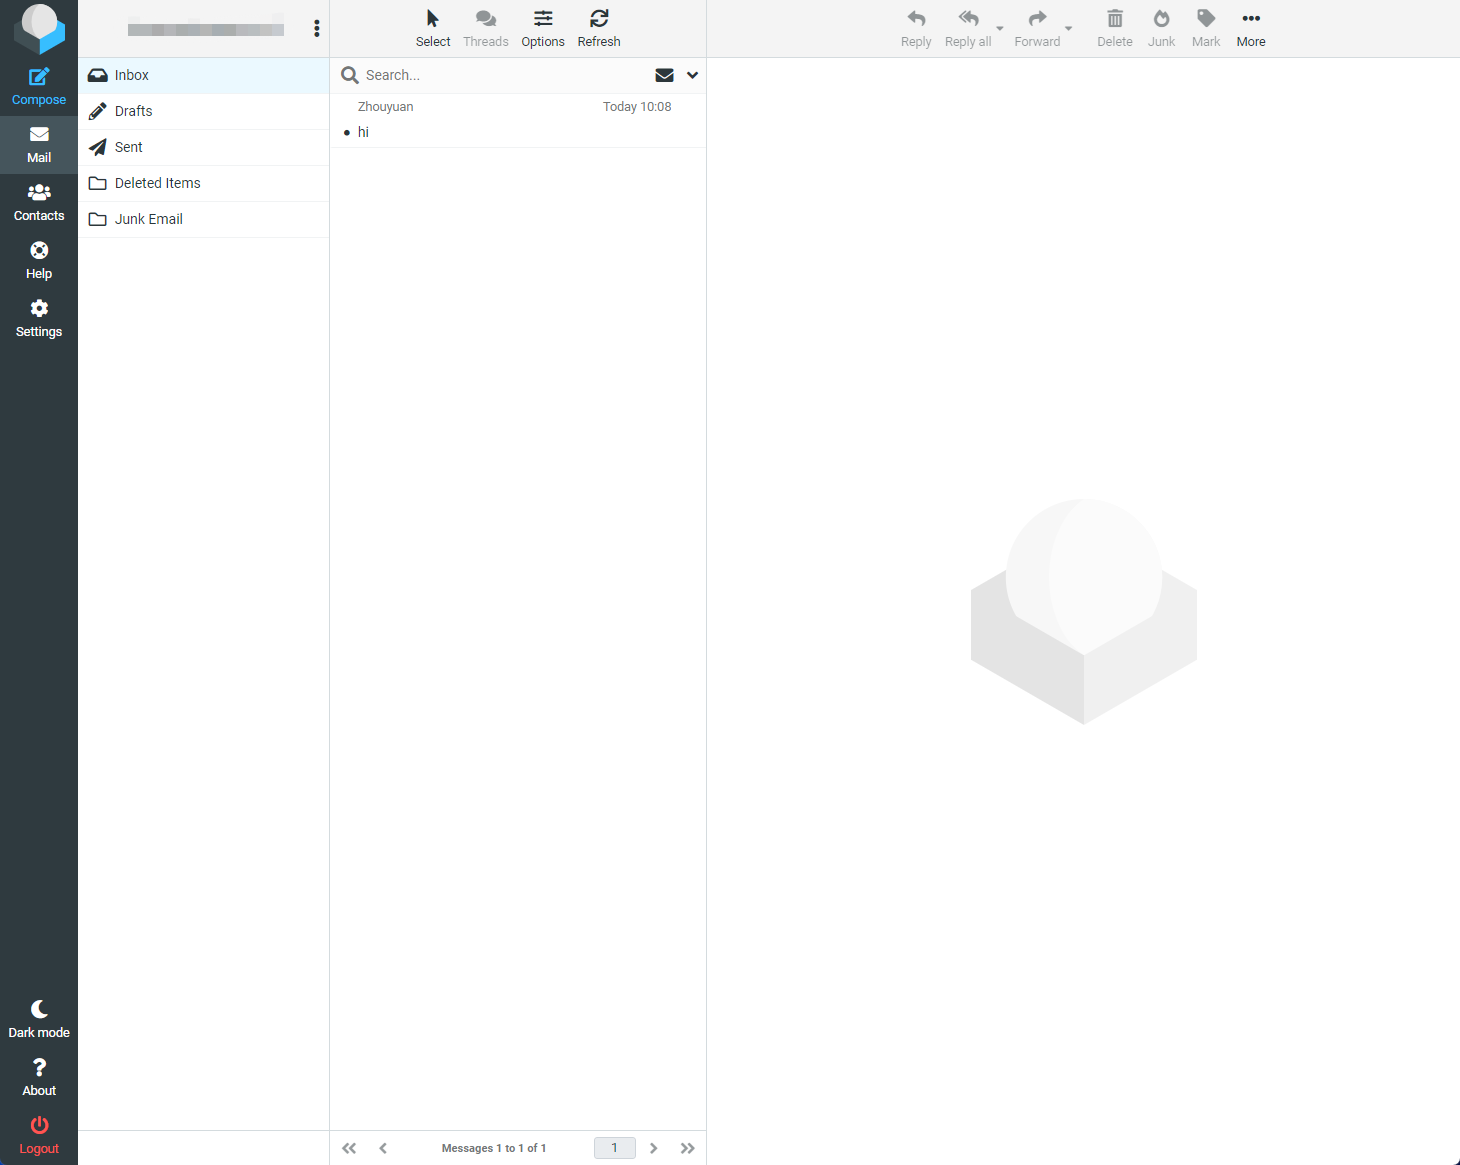
如果出错,可以去debug,在config/defaults.inc.php加入以下参数即可,然后log会在/var/log/syslog
// ----------------------------------
// LOGGING/DEBUGGING
// ----------------------------------

// log driver:  'syslog', 'stdout' or 'file'.
$config['log_driver'] = 'syslog';

// date format for log entries
// (read http://php.net/manual/en/function.date.php for all format characters)
$config['log_date_format'] = 'd-M-Y H:i:s O';

// length of the session ID to prepend each log line with
// set to 0 to avoid session IDs being logged.
$config['log_session_id'] = 8;

// Default extension used for log file name
$config['log_file_ext'] = '.log';

// Syslog ident string to use, if using the 'syslog' log driver.
$config['syslog_id'] = 'roundcube';

// Syslog facility to use, if using the 'syslog' log driver.
// For possible values see installer or http://php.net/manual/en/function.openlog.php
$config['syslog_facility'] = LOG_USER;

// Activate this option if logs should be written to per-user directories.
// Data will only be logged if a directory <log_dir>/<username>/ exists and is writable.
//$config['per_user_logging'] = false;

// Log sent messages to <log_dir>/sendmail.log or to syslog
$config['smtp_log'] = true;

// Log successful/failed logins to <log_dir>/userlogins.log or to syslog
$config['log_logins'] = false;

// Log session debug information/authentication errors to <log_dir>/session.log or to syslog
$config['session_debug'] = false;

// Log SQL queries to <log_dir>/sql.log or to syslog
$config['sql_debug'] = false;

// Log IMAP conversation to <log_dir>/imap.log or to syslog
$config['imap_debug'] = false;

// Log LDAP conversation to <log_dir>/ldap.log or to syslog
$config['ldap_debug'] = false;

// Log SMTP conversation to <log_dir>/smtp.log or to syslog
$config['smtp_debug'] = false;

// Log Memcache conversation to <log_dir>/memcache.log or to syslog
$config['memcache_debug'] = false;

// Log APC conversation to <log_dir>/apc.log or to syslog
$config['apc_debug'] = false;

// Log Redis conversation to <log_dir>/redis.log or to syslog
$config['redis_debug'] = false;
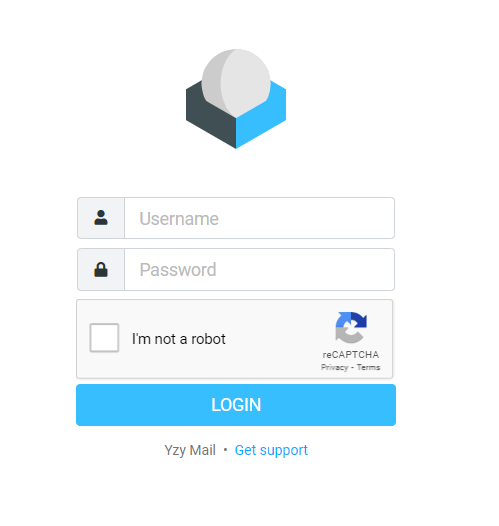
配置 #8 安装验证码插件
我这里用的是rcguard,在composer.json文件的require,加入"dsoares/rcguard": ">=1.3.2"
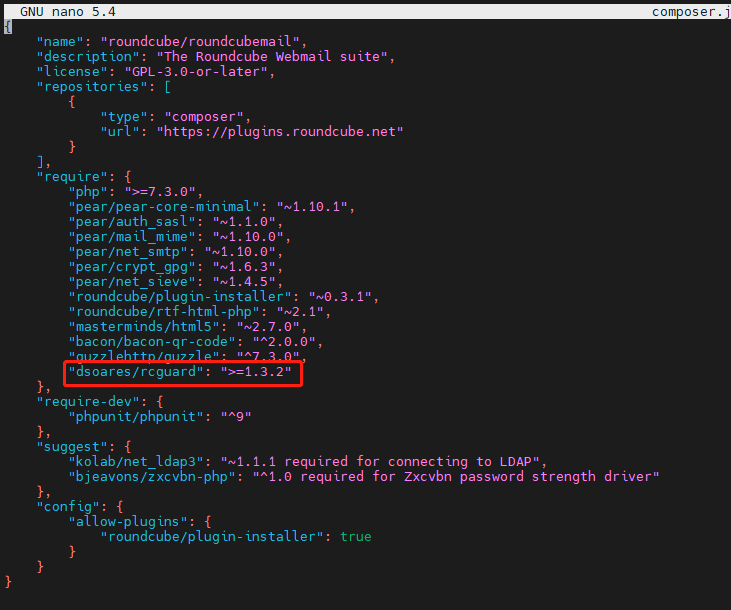
通过composer安装插件
# composer update进入文件夹 plugins/rcguard,并通过复制config.inc.php.dist来生成config.inc.php
根据配置文件,填入Google的一些key文件即可
参考链接:
- https://www.digitalocean.com/community/tutorials/how-to-install-your-own-webmail-client-with-roundcube-on-ubuntu-16-04
- https://github.com/roundcube/roundcubemail/wiki/Installation
- https://wpquark.com/kb/misc/server-management/fixing-curl-ssl-connection-issue-php-ini/